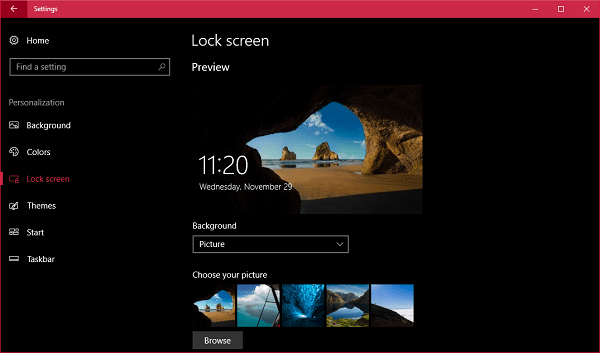
Windows 10 is home to lots of useful features, and one out of them is Windows Spotlight feature. It let users retrieve a photo from Bing and set it as a background image on the Windows 10 lock screen automatically. Windows then users can enable spotlight feature in Windows 10 right from the settings app. For that, launch Settings -> Personalization -> Lock Screen and on the right side select Windows Spotlight using Background Spotlight. That’s it. The feature will only work if your Windows 10 PC is connected to an internet connection. If not, the feature will not be able to download the new background image for Lock Screen.
[FIX] Windows Spotlight Not Working on Windows 10
There are lots of users reporting that Windows Spotlight was not working for them. While other shared that the Windows Spotlight stuck on the same picture. In case, you’re one out of the user-facing the same issue, then in upcoming lines, you will find possible ways to reset Windows Spotlight preferences. After applying these methods, you can probably fix Windows Spotlight issues.
Use File Explorer
- Launch Settings app. For that press WIN + I keyboard keys. Click on Personalization -> Lock Screen. On the right side under Background section use the drop-down and select Pictures and make it default lock screen background.
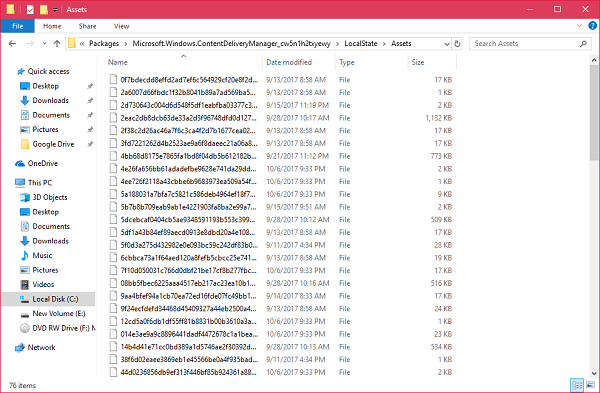
Note: Before following next step make sure, hidden items options is enabled. If not, learn how to show hidden items in Windows 10 File Explorer. you will see a warning message. For that, launch File Explorer -> View -> Check box for “Hidden items” 2. After that, launch File Explorer. For that press WIN + E. In the address bar paste the following address and hit enter: Here in this folder, you will find out different packages. You need to look for the one something named as ”
In my case, its “Microsoft.Windows.ContentDeliveryManager_cw5n1h2txyewy”. In your case, the character set can be different. Simply click to open this folder -> LocalState -> Assets.
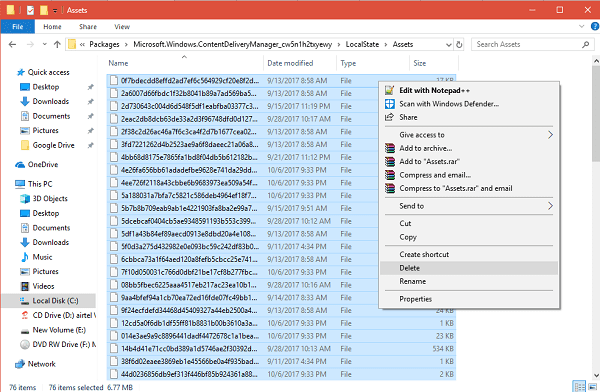
In this Assets folder, you will see a list of different files just delete everything.
After doing this, again Enable the Windows Spotlight feature in the Settings app.
Now Press WIN + L to bring the Lock Screen, and you will see a Windows Spotlight screen. 🙂 Majority of the users able to fix issues related to Windows Spotlight by following this workaround. In case, it’s not working for you; then last resort is the next method.
Re-Register Windows Spotlight
Some users also suggested they fixed the issue by Re-registering Windows Spotlight package. Here is how you can do that.
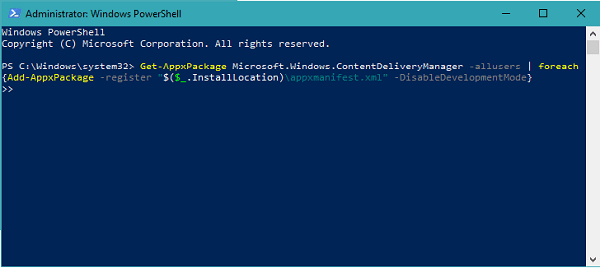
Press WIN + X keyboard keys and from WINX context menu select Windows Powershell (Admin). When UAC dialog box appears, click Yes to continue.
In the Windows Powershell terminal copy and paste following code:
And wait until the process is completed. Once done reboot the system. Now try to check the Lock Screen, I’m sure Windows Spotlight feature will be working flawlessly. I hope you find this article on fixing Windows Spotlight not working in Windows 10 issue useful.